

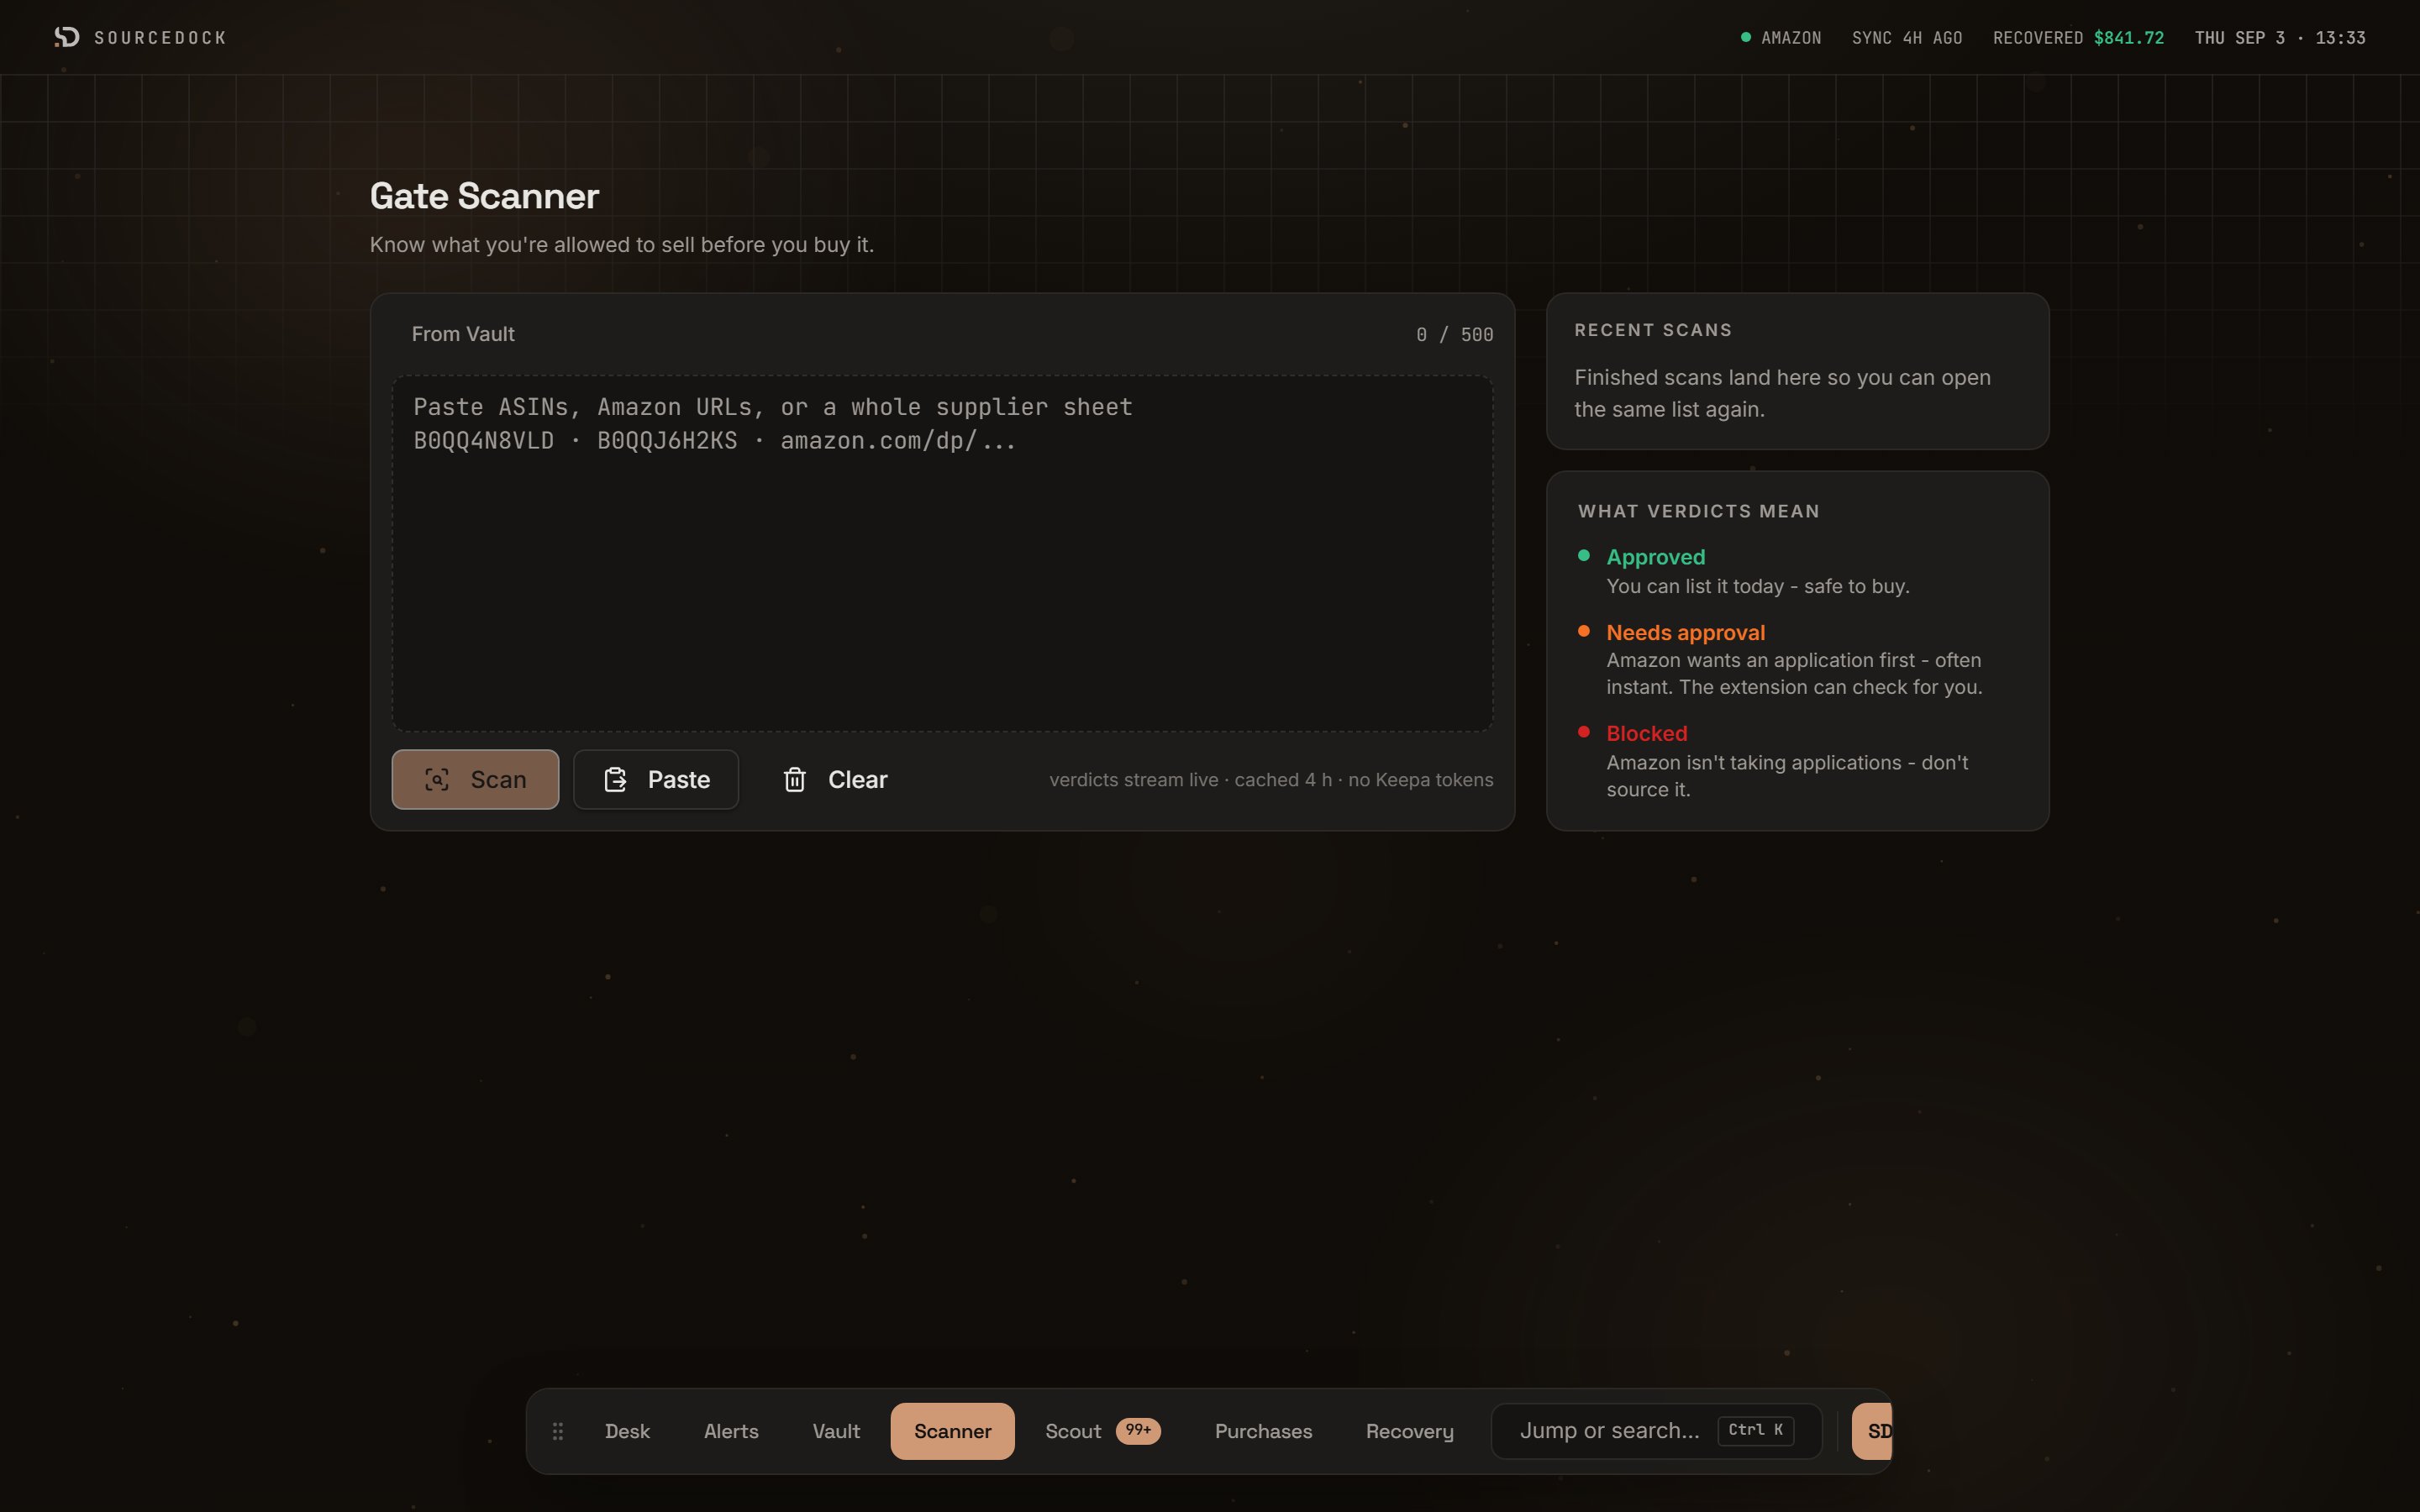
The Gate Scanner before your first scan. Paste on the left, recent scans and the verdict key on the right.
Before you start
You need an Amazon seller account connected to SourceDock. Without one, the scan button stays off and the hint reads Connect an Amazon seller account to scan. A notice at the top says No Amazon account connected with a link to connect it. The SourceDockIQ Chrome extension is optional. You only need it for the Verify step. See Chrome extension.The verdicts
Every ASIN gets one of three verdicts. A fourth bucket, Errors, holds ASINs Amazon could not answer. The verdict key on the first-run screen says the same thing in short form.Add your ASINs
Type or paste into the big box. It accepts plain ASINs, Amazon product links, and whole supplier sheets. The scanner keeps every code that looks like an ASIN and drops the rest. Codes can be on new lines or split by commas. You can also drag a.csv, .tsv, or .txt file onto the box.
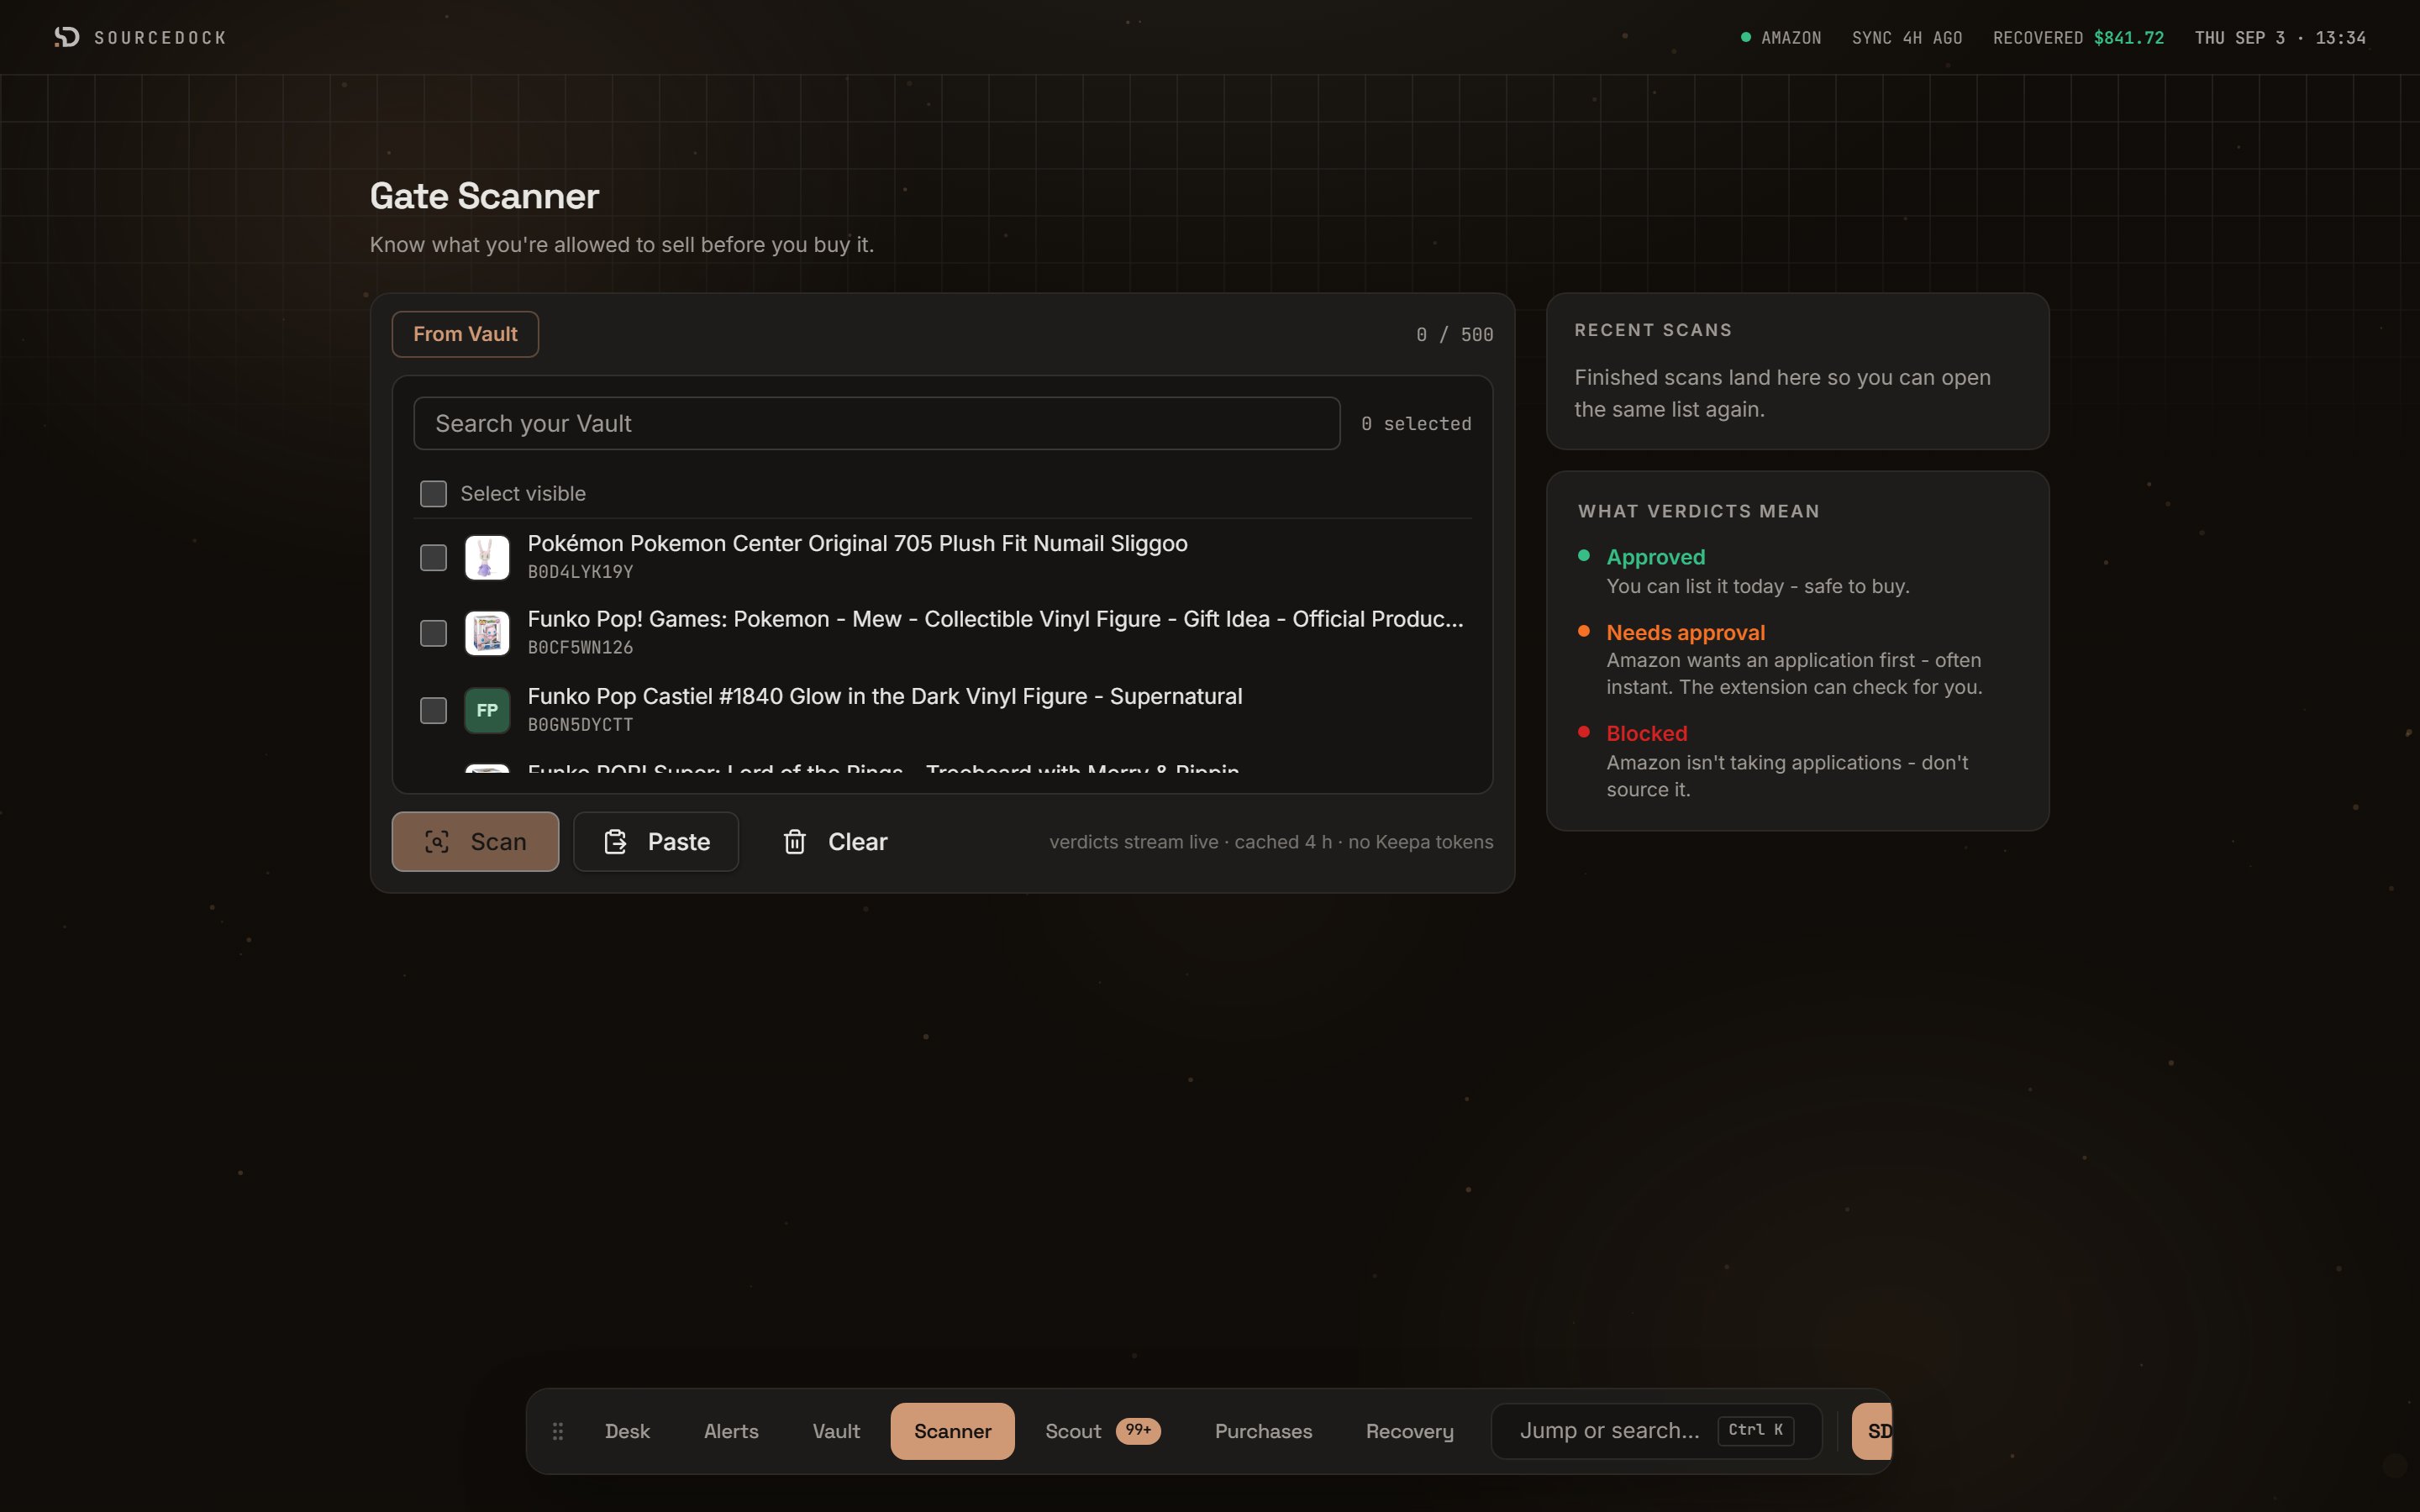
Picking Vault prospects to scan. Search, tick rows, or tick the top box to select all.
If you go over, the hint turns amber and reads
120 ASINs - your plan allows 50 per scan with an Upgrade link. The scan button stays off until you trim the list.
Run the scan
1
Fill the box
Paste your list or pick from the Vault. The hint under the buttons shows
12 ready.2
Click Scan
The button reads Scan 12 ASINs. It changes to Scanning… while the scan runs.
3
Watch the verdicts land
The page switches to the scan desk. Verdicts appear one by one as Amazon answers.
Read the results
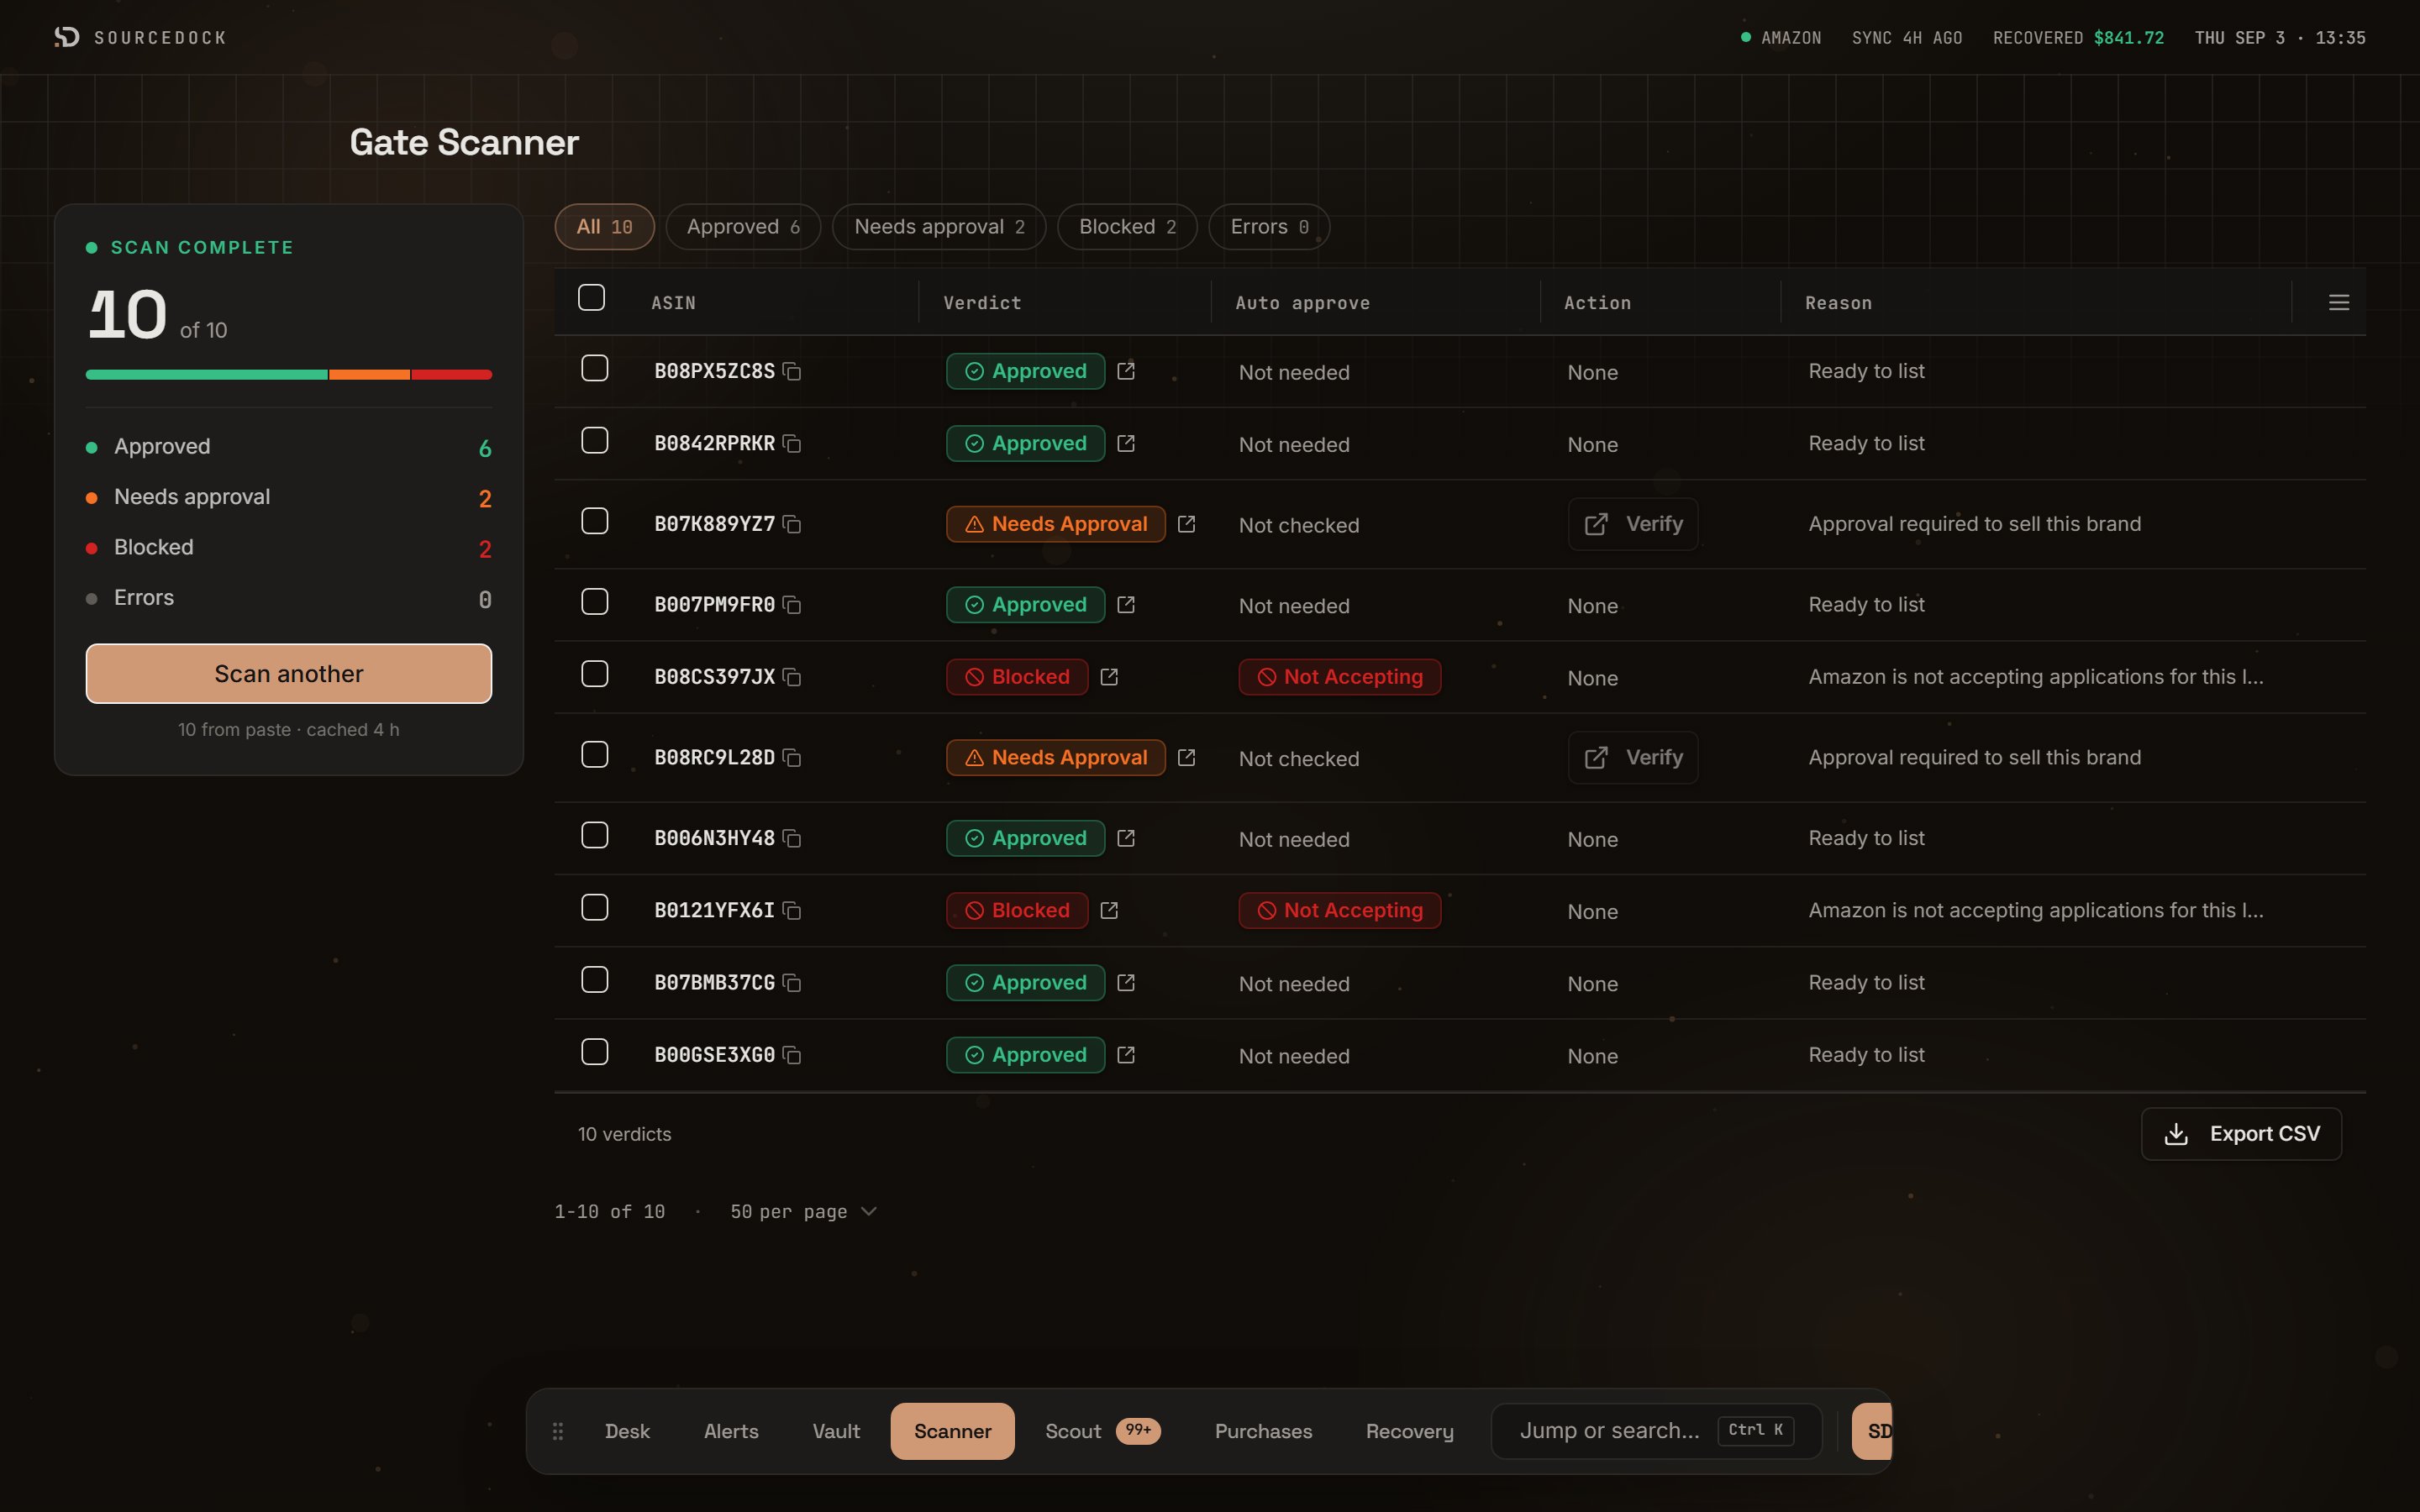
A finished scan. Filter chips on top, the results table below, Export CSV in the footer.
The menu icon at the end of the header row lets you hide, rename, or reorder columns. The footer shows the verdict count and a pager with 10, 25, 50, or 100 rows per page. Click Scan another on the status card to go back to the paste box. The card also notes that verdicts are cached for 4 hours.
Verify with the extension
Needs approval means Amazon wants an application. Verify shows you what that application looks like without leaving the desk.1
Connect the extension
Verify is off until the extension is connected. Then a green Extension connected pill sits next to the page title.
2
Click Verify on a row
The extension opens that listing in a new Seller Central tab. You click through the page yourself. The extension only reads the outcome you see. It never clicks for you.
3
Read the Auto approve column
While the check runs the row reads Checking… with an X to cancel. When it finishes you see a badge with a short confidence bar. It reads Auto-Approved, Documents Required, Info Required, or Not Accepting.