

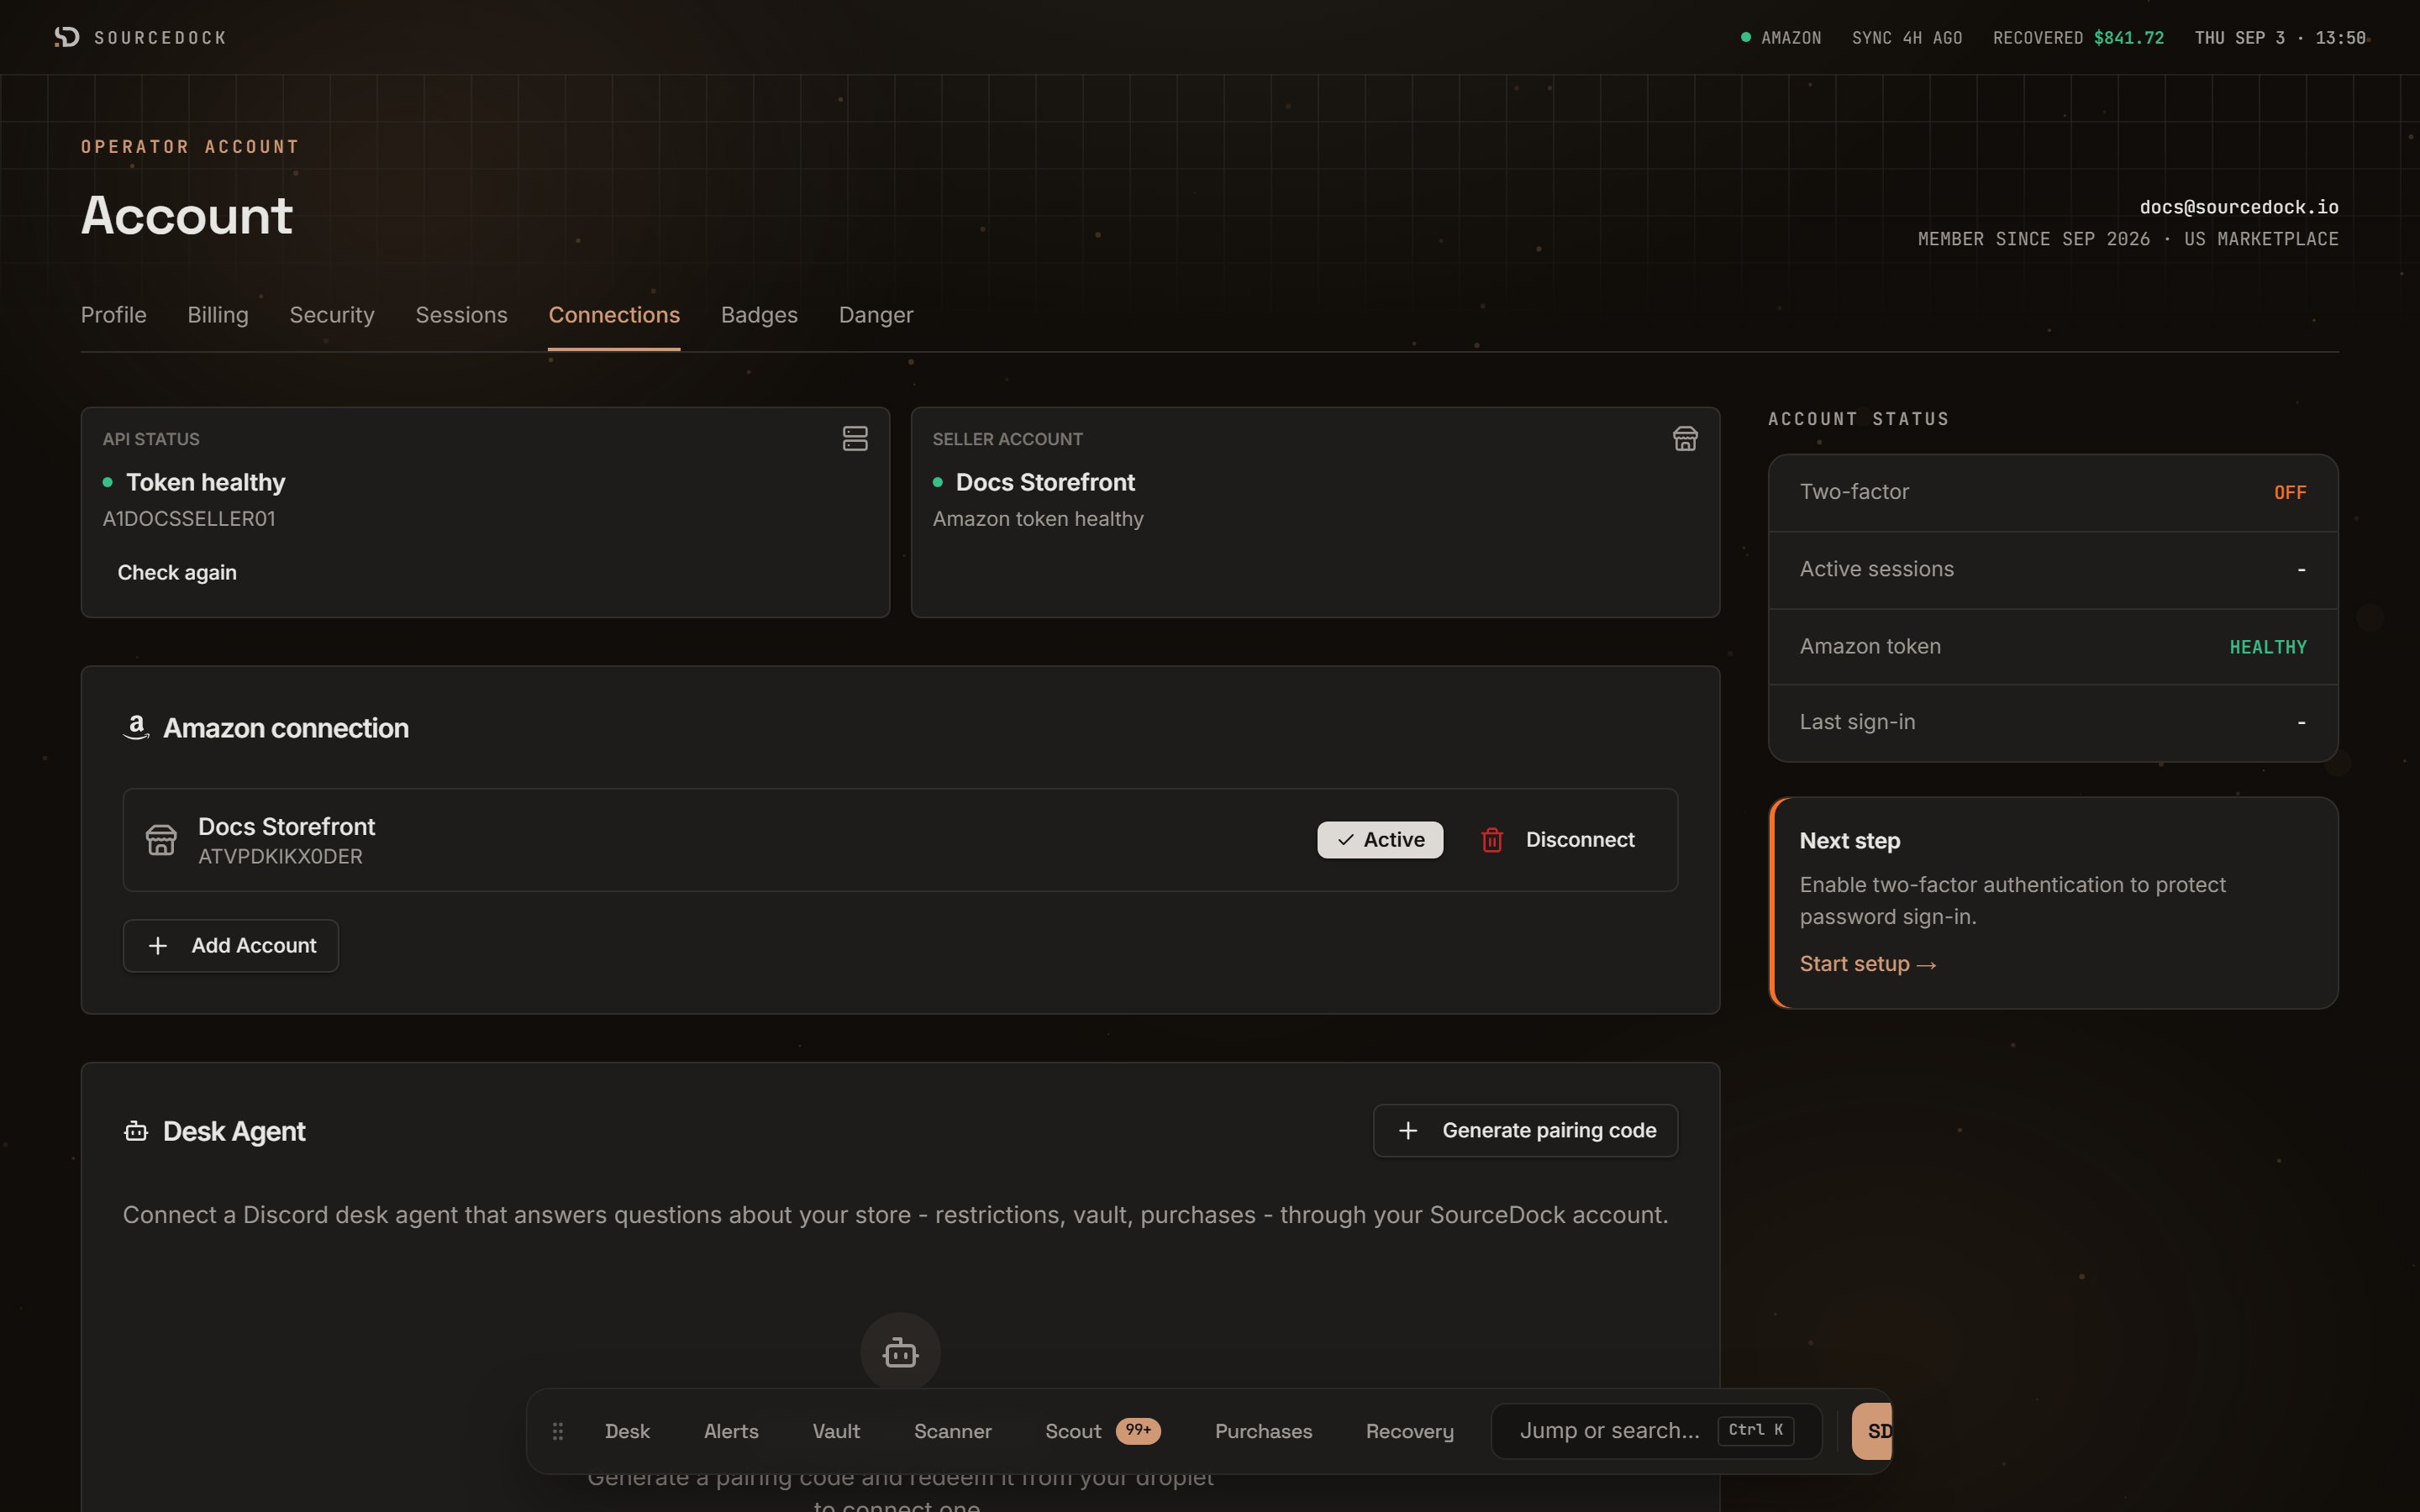
The Connections tab with one healthy Amazon account.
Before you connect
You need two things first. Until both are done, the connect step does not go through.- A verified email. A bar at the top of the app says Verify your email until you click the link SourceDock sent you.
- An active plan or trial. See Plans and billing.
The two status tiles
Two small tiles sit at the top of the page. API status shows if SourceDock can talk to Amazon right now. A token is a key Amazon gives SourceDock when you approve the link.
Click Check again to run the check now. It says Checking… while it runs. This button shows only once an account is linked.
Seller account shows which account is active. It shows the store name, or the seller ID if there is no name. A short line sits under it:
If no account is linked, the tile shows a Connect account button instead.
Connect your first account
1
Click Connect Your First Account
In the Amazon connection card, click Connect Your First Account. The button says Redirecting… and Amazon opens.
2
Approve at Amazon
This is Amazon’s own consent screen. Log in to Seller Central if asked. Approve the request.
3
Come back to SourceDock
Amazon sends you back here. A message says Amazon account connected. The account shows in the list with an Active badge.
What SourceDock can read
The card lists what you agree to before you click:- Read access to restrictions, catalog, pricing, and fees.
- On Pro and Flagship, read access to financial settlement data. That is the record of what Amazon paid you.
- Your credentials are stored encrypted (AES-256-GCM).
Your account list
Each linked account is a row in the Amazon connection card. A row shows the store name and the marketplace ID.Add a second account
Click Add Account under the list. Amazon opens the same consent screen. Approve it with the second seller login. The new account appears as a new row. Click Set Active on the row you want to work with. Only one account is active at a time. The tiles, the Scanner, the Vault, and Recovery all follow it.Disconnect an account
Click Disconnect on the row. On a small screen you see only the trash icon. A box asks Disconnect Amazon account? It reminds you that your Vault, purchases, Recovery, and Scout data stay. SourceDock only stops calling Amazon for that account. Click Disconnect to confirm. A message says Seller account removed.None of your data is deleted. You can link the same account again later.
When a connection needs attention
Sometimes you see Amazon connection needs attention. It comes from one fact. You have a linked account, but its last token check failed. Amazon rejected the key. This happens when the approval expires, or when something changes on the Amazon side.
To fix it:
1
Open Connections
Click the red notice, or open Connections from your avatar menu.
2
Click Reconnect
Click Reconnect on the active account row. Amazon opens. Approve the request again.
3
Check again
Back on Connections, click Check again in the API status tile. It should now say Token healthy. The red notice goes away on its own.